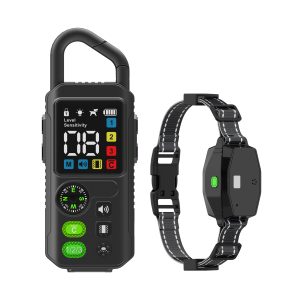
Setting Up Your AS-7 Wireless Dog Fence: A Step-by-Step Guide
Are you considering getting an AS-7 Wireless Dog Fence for your furry friend? This advanced system provides a safe and effective way to contain your pet while giving them the freedom to roam within set boundaries. Here’s how you can set it up hassle-free.
Step 1: Unboxing the AS-7 Wireless Dog Fence
Start by carefully unboxing your AS-7 Wireless Dog Fence system. Ensure all the components are present, including the transmitter, receiver collar, boundary flags, and the manual.
Step 2: Setting Up the Transmitter
Find a central location for the transmitter in your home. Ideally, it should be placed indoors, away from metal objects and large appliances. Plug in the transmitter and adjust the signal strength based on your pet’s size and breed.
Step 3: Establishing Boundaries
Place the boundary flags around your desired containment area where you want your dog to stay within. These flags act as visual markers for both you and your pet.
Step 4: Fitting the Receiver Collar
Fit the receiver collar comfortably on your dog. Ensure it is snug but not too tight. Test the collar to make sure it beeps and provides static correction when your dog approaches the boundary.
Step 5: Training Your Dog
Start training your dog with the AS-7 Wireless Dog Fence by using positive reinforcement techniques. Reward your dog when they stay within the boundaries and correct them gently when they stray.
Step 6: Monitoring and Adjusting
Regularly monitor your dog’s behavior with the wireless fence. Make adjustments to the boundaries if needed and continue training sessions to reinforce good behavior.
By following these steps, you can ensure a smooth and successful setup of your AS-7 Wireless Dog Fence. Enjoy the peace of mind knowing your pet is safe and secure in their designated area.


